
Neon vs LED: How Modern Signage Changes Your Night Photography
Neon vs LED: How Modern Signage Changes Your Night Photography
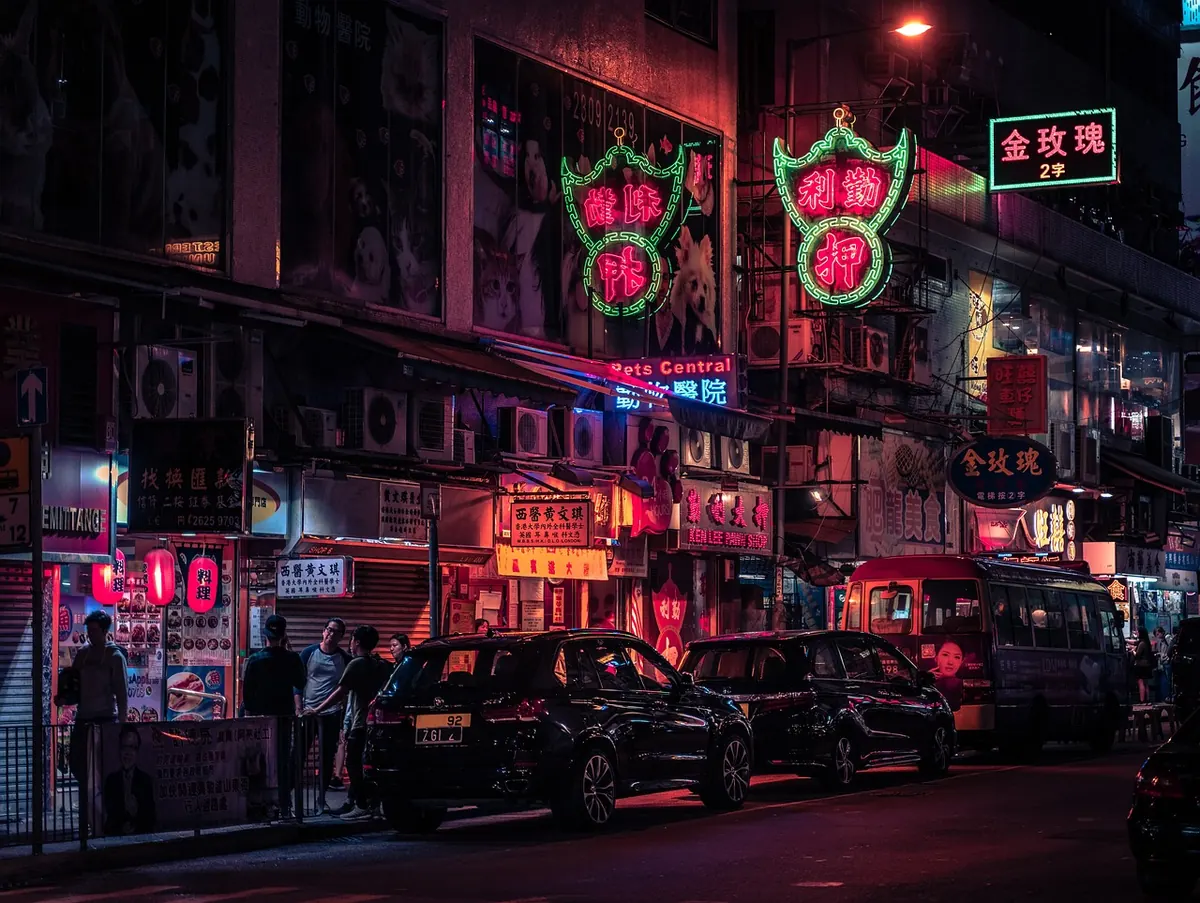
Rain on a Tuesday night, an empty high street, and a chip-shop sign doing most of the work in the frame. That photograph lives in a lot of heads, and it is surprisingly hard to nail, because the light doing the work is either a glass tube filled with gas or a sheet of emitting diodes. The two behave nothing alike once you put a camera in front of them.
Both are bright, both are colourful, both look similar on a phone screen at 11pm. Get close with a tripod and the differences show up fast: in colour cast, in flicker, and in how much of the sign you can keep from blowing out. A neon tube is a hot, narrow line of colour. An LED panel is a cool, broad slab of light. Learn to see that distinction and the night street stops being a single exposure problem and becomes a series of small, solvable ones.
Two very different light sources
Neon is a sealed glass tube with a high-voltage transformer at one end. Pure neon glows the familiar orange-red; argon mixed with a little mercury, plus phosphor coatings inside the tube, gives you the blues, greens, pinks and whites. What matters for photography is the spectrum. Neon emits a few narrow bands of colour rather than a broad wash, so the light is extremely saturated and sits in a very small slice of the visible spectrum.
That narrowness is the whole story. A red neon tube is not simply “red light” in the way a red gel over a lamp is. It is a spike at a specific wavelength, and your camera’s sensor, white balance and colour profile are all trying to translate that spike into a normal scene. Sometimes they succeed and you get that rich, electric red. Sometimes they fail and the tube clips to a flat, plastic pink with no detail in the glass.
Modern LED signage is the opposite in almost every way. Whether it's a white "café open" panel or a giant video billboard, you're usually looking at blue-emitting diodes behind yellow phosphor, or a cluster of red, green and blue emitters behind a diffuser. LEDs give a lumpy but much broader spectrum, and screen-based signs are effectively a television in a weatherproof box.
Your camera's white balance was designed with daylight and tungsten in mind. It can shift a broad spectrum. It cannot do much with a narrow one, which is why a neon tube and an LED panel can sit in the same frame and refuse to be reconciled. You can set the white balance for the pavement, for the LED sign or for the neon, but you cannot set it for all three at once. That is not a failure of your camera. It is physics.
Neon paints with a scalpel. LED washes with a roller. Your job is to decide which one gets to define the scene.
Flicker, scan lines and the shutter-speed trap
This is where LED signage separates itself from neon in a way that ruins more night photographs than colour cast ever will. Many LED panels are not lit continuously. They are pulsed on and off very quickly—a technique called pulse-width modulation—to control brightness. Your eye averages the pulses into steady light. Your camera does not.
Use a fast shutter speed and you can catch the sign mid-pulse. The result is banding: dark horizontal stripes across the panel, or a patchy, uneven glow that looks like a broken screen. With an electronic shutter or a phone camera, you may also see rolling-shutter skew, where vertical lines lean or wobble. Neon, by contrast, is usually steady. An old or failing tube might flicker or buzz, but it does not switch on and off at a frequency designed to fool your sensor.
The fix is not glamorous. Slow your shutter speed down. In a 50Hz country, 1/50 sec or 1/60 sec is a good starting point; in a 60Hz country, try 1/60 sec or 1/30 sec. If the banding persists, test a few speeds and check the back of the camera at 100% zoom. Avoid very fast speeds like 1/1000 sec unless you have tested the sign and know it is safe. If you are using a phone, some models have an anti-flicker setting; use it, and avoid the fastest burst modes.
There is a creative upside. Sometimes a little banding looks like atmosphere, especially on a distant billboard behind rain. But if you want clean text and solid colour, shutter speed is the first control to check, not the last.
Colour casts: saturated pools versus cold spill
A red neon tube lights a small puddle of the world. Because the light is so narrow, it doesn't illuminate other colours properly: a red-lit pavement reads as deep, flat red, and a person standing under it goes almost monochrome. That's a look, not a fault, and it's why wet cobbles under a butcher's sign still beat anything a filter will do.
LED signage spills. A large billboard lights the entire street, usually cool and blue-heavy, sometimes with a faint magenta or green tint depending on the panel. So a single frame can hold warm, saturated neon on one side and flat, cold LED spill on the other, with sodium street lamps adding orange in the gaps.
You cannot neutralise all of it, so decide what should read as natural. Usually that's the pavement or a person's jacket, while the signs are left to be signs. If you are photographing a person under a neon sign, accept that their skin may lose its usual warmth. If you are photographing them under an LED shopfront, expect a clinical blue cast that makes everyone look slightly unwell. Both can be used deliberately. The mistake is trying to make every part of the frame look like noon in a studio.
One practical trick is to shoot raw and set white balance in post. Start by neutralising the largest mid-tone area—the pavement, a wall, the side of a van—then adjust the sign separately if you can. If you are working in JPEG, set a custom white balance on the street surface, not on the sign, and let the sign be as saturated or as blue as it wants to be.
Exposing for two kinds of light
Neon and LED also demand different exposure strategies because they are different shapes. A neon tube is a tiny, intense line. A billboard is a huge, bright rectangle. Your camera’s meter sees an average, but your eye sees the sign. That mismatch is why so many night shots have blown-out signs and muddy streets.
For neon, expose for the tube. Use highlight warnings or the histogram and let the surrounding street fall dark if it must. The tube is the subject. If you want the pavement to read as well, bracket: one frame for the sign, one for the street, one for the shadows, then blend later. A single exposure can often hold the neon if you shoot at a low ISO and accept some noise in the shadows.
For LED, expose for the panel’s text or image, especially if it is a billboard with readable content. LED panels are usually large enough to light the street around them, so you may not need to push the shadows as hard. Be careful of white LED signs: they are often brighter than they look through the viewfinder, and a white “OPEN” sign can clip to pure white before the rest of the frame is even close.
A few habits help in both cases:
- Use a tripod and manual mode. Night signage is not the place for auto exposure chasing a blinking panel.
- Shoot at base ISO. Keep the noise down so you can lift shadows later.
- Bracket three to five frames.
Photo: Philippsaal / Pixabay