
Blue Hour in Britain: A Beginner's Guide to Photographing Cities at Dusk
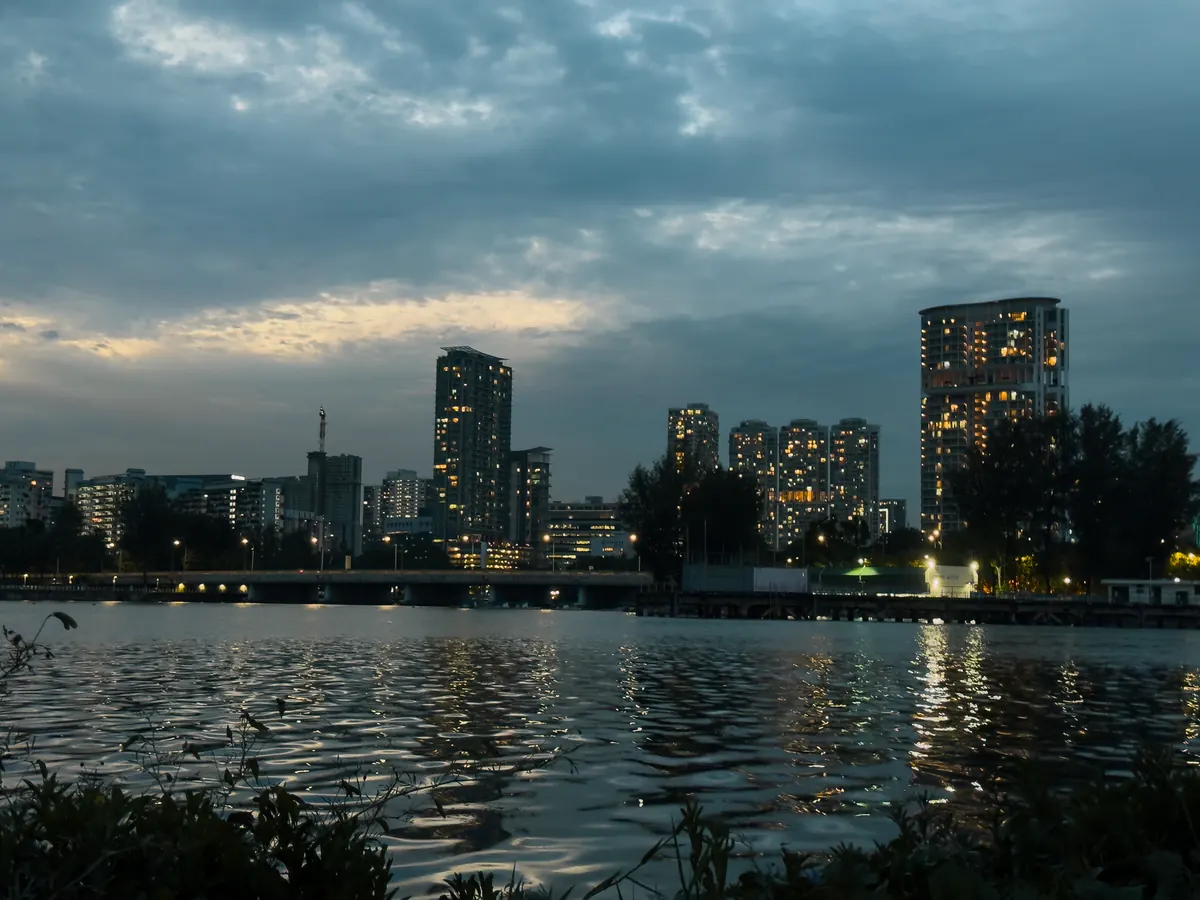
The lights come on before the sky gives up. For twenty minutes or so, office windows glow like small fires above streets still blue-grey with the last of the daylight, and every wet paving slab turns into a mirror. Photographers call it the blue hour — a generous name for something that rarely lasts sixty minutes. Miss it and you get another go tomorrow, but only if you have a rough idea of when it will arrive.
What the blue hour actually is
It sits between sunset and proper night, when the sun is roughly four to eight degrees below the horizon. The sky is no longer bright enough to be the subject, but lamps, shopfronts and lit windows have begun to hold their own against it. That balance is the point: cool blue overhead, warm orange at street level, neither one winning.
Britain does this well. Because the sun sets at a shallow angle here, twilight lingers — in June, northern cities stay light until nearly eleven, and the sky never quite goes black. In December the window can close in twenty minutes and the light turns a heavier, colder blue. Spring and autumn sit in the comfortable middle.
Cloud matters more than the clock. Flat overcast gives you a grey wash with no colour in it. Broken cloud after rain is the prize: gaps for the blue, low cloud to catch the last warm light, and wet ground to reflect both.
Find your timing before you leave the house
A sun-position app — SunCalc, or The Photographer's Ephemeris — will give you sunset and the end of civil twilight for any postcode. As a rule of thumb, blue hour begins fifteen to twenty minutes after sunset and runs for another twenty to forty, longer in the north and longer still in summer.
Work backwards from that and arrive forty minutes early. That is enough time to find your spot, set up and watch the light change instead of chasing it. Check the cloud forecast rather than the rain radar alone; a clear evening is pleasant to stand in and dull to photograph. Check the tide as well if your view involves a river, because low water can leave you looking at mud where you expected reflections.
Kit that earns its place
One item separates a decent dusk photograph from a smeared one, and it is not the camera.
- A tripod, plus a way of firing the shutter without touching the camera — a remote release or the two-second timer.
- A standard zoom, roughly 24–70mm, for street scenes. A telephoto is worth the weight if you want to compress a skyline or isolate a single lit window.
- Spare batteries. Cold evenings drain them faster than you expect, and a warm spare in an inside pocket beats a dead camera.
- A lens cloth and a small torch — one for drizzle on the front element, the other for finding a dropped lens cap in the dark.
- Layers and gloves. Standing still in a riverside wind for an hour is colder than walking for three.
Leave the flash at home. It will light the railing in front of you and nothing else.
Camera settings that keep you out of trouble
Start with a baseline
An aperture around f/8 gives a sharp frame with enough depth for foreground paving and distant towers. Keep ISO as low as the tripod allows; 100 to 400 covers most evenings. Exposures of a quarter of a second to a few seconds are normal, so use RAW and let the tripod do the steadying. Aperture priority is fine. Manual is better if you want consistent exposure across a series of frames.
Watch the highlights
Street lamps, lit windows and headlights blow out quickly, and a white blob with no colour in it looks like a mistake. Turn on highlight warnings and check the histogram. Set exposure so the brightest lamps are just holding their colour, then let the sky sit slightly darker than feels right. You can lift it later; you cannot retrieve a burnt-out lamp.
Focus and colour
Autofocus on a lit building, then switch to manual so the lens stops hunting as the light drops. Or use live view, magnify, and focus by hand. For colour, daylight white balance is a reasonable start, or somewhere around 3800–4500K to cool the sky while keeping the warm glow of the lamps. If in doubt, leave it on auto and correct in RAW.
Composing a British city at dusk
Every city has its dependable viewpoint: the Tyne bridges from Newcastle's quayside, the waterfront at Liverpool with the Royal Liver Building, Bristol's harbourside, the canals around Birmingham. They are popular for good reason. Shoot them once, then go looking for something better.
Water and wet ground are your allies. They double the height of every building and spread the warmth of the lamps across the frame. So are leading lines — a kerb, a run of railings, a towpath, a tram line — which carry the eye inwards far more elegantly than a wide shot taken from the middle of a bridge.
Look for the warm-cool contrast that makes dusk photographs work: a blue sky above orange shopfronts, a glass office reflecting both. Include people when you can, because one figure crossing a lit square gives scale and a story that an empty street lacks. Get low for reflections, and do not be afraid to frame vertically — a tower above its own reflection often beats the same tower parked in the middle of a horizontal frame.
Work one location properly
Chasing the sunset means you are always arriving late. Better to pick one spot and let the light come to you. A workable half-hour:
- Arrive in daylight and find two or three frames: a wide one and a tighter detail.
- Shoot the wide view about ten minutes after sunset, when the sky still holds colour and the lamps are on.
- Switch to a longer lens as the sky deepens — lit windows, bridges, light on water.
- Try a slow exposure of one or two seconds and let a passing bus or cyclist cross the frame as a streak.
- Finish with a vertical, or a lower angle, before the sky goes properly black.
Do not pack up the moment the blue fades. The five minutes afterwards are when the lit city starts to look like itself.
Before you head out
Charge everything, fill a flask, and check the cloud forecast an hour before leaving. Arrive while there is still daylight in the sky, because the blue hour will not wait for you to find your tripod plate. If you are shooting alone after dark, stick to lit, busy areas — riverside paths and canal towpaths empty out quickly — and tell someone roughly where you are and when you expect to be back.
Then the simple part: camera on the tripod, hands in pockets, and wait for the lights to win.
Photo: Shlok Rana / Pexels